
How to Set Up COGS Tracking on Shopify (Step-by-Step)
You know your profit margins matter. But if you're not tracking the cost of goods sold (COGS) in Shopify, you're essentially flying blind—guessing which products actually make you money and which ones drain your cash flow.
The good news? Setting up COGS tracking in Shopify isn't complicated. The tricky part is choosing the right method for your situation.
In this guide, I'll walk you through every option: Shopify's built-in cost field, bulk CSV imports, and specialized COGS tracking apps. By the end, you'll know exactly which approach fits your business.
Why COGS Tracking Matters (The Quick Case)
Before we dive into setup, let's be honest about why this matters.
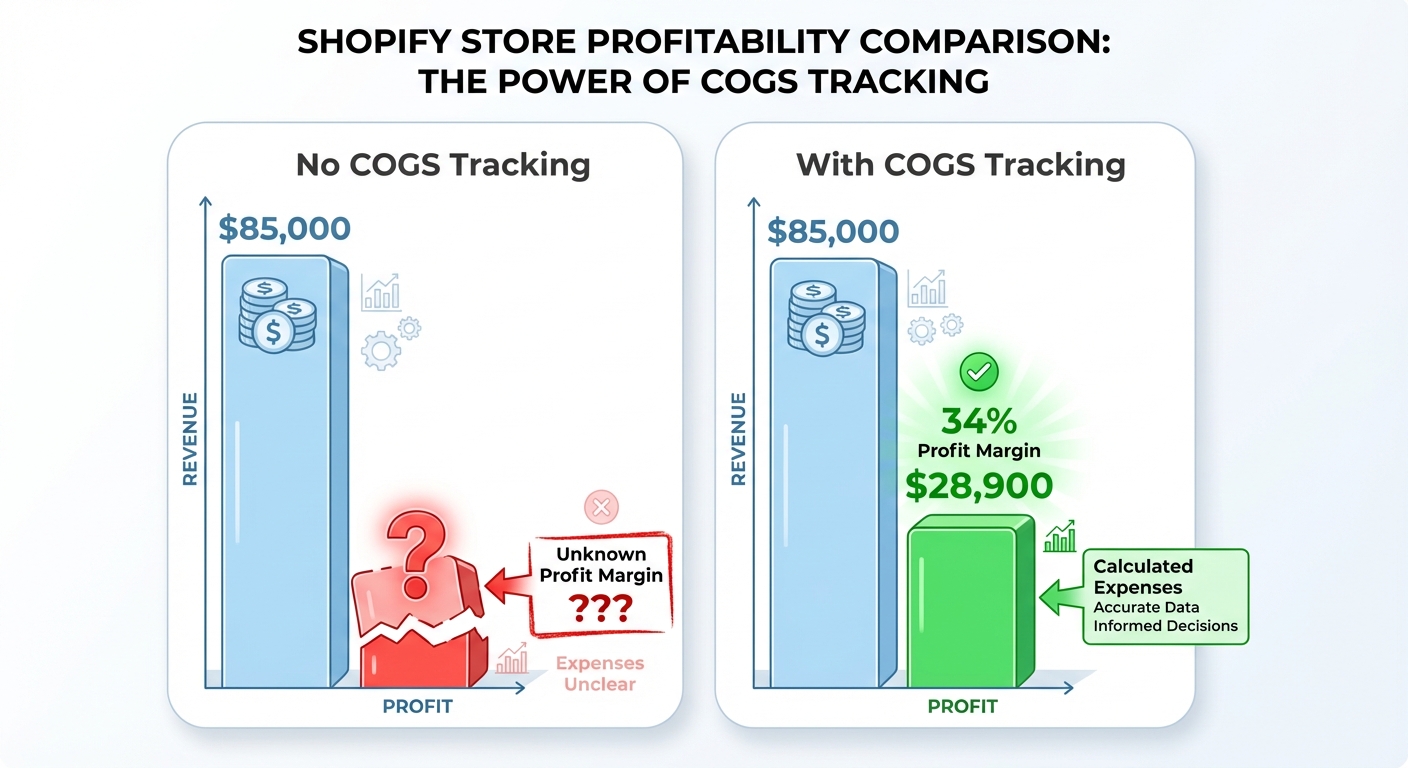
If you're selling 150 products with 3 variants each, you've got 450 individual cost entries to maintain. If those costs drift out of sync with your supplier prices, your profit reports become fiction. A product you think is profitable might actually be losing $2 per sale.
Shopimize tracks this data for your Shopify store. But first, you need to decide how that data gets into Shopify in the first place.
Method 1: Shopify's Built-in Cost per Item Field
Time to set up: 15 minutes (single product) to 2+ hours (catalog of 100+)
Best for: Small catalogs, stable costs, low-inventory SKUs
Accuracy rating: High (if maintained)
Shopify has a native "Cost per item" field built into every product variant. This is the foundation of everything else.
Step 1: Access a Product's Variant Costs
- Log into your Shopify admin
- Navigate to Products
- Select a product
- Scroll to the Variants section
- Click a variant (or create one if you're starting fresh)
- Look for the Cost per item field—it's usually below the pricing section
[IMAGE PLACEHOLDER: Screenshot of Shopify admin showing the Cost per item field in a variant editor, with a red arrow pointing to the field location]
Step 2: Enter the Cost
Type the cost of that specific variant. Use the decimal format—$10.50 becomes 10.50 in the field.
Important: This cost should include the landed cost of the product at your warehouse, not just the supplier invoice. That means:
- Product cost from your supplier ✓
- Inbound shipping (per unit) ✓
- Import duties or tariffs ✓
- Packaging materials (if you count them) ✓
For a full breakdown of what belongs in COGS, see our complete COGS guide for Shopify merchants.
Step 3: Save and Repeat
Click Save and move to the next variant or product. Yes, it's manual. Yes, it scales poorly.
Real example: You sell a t-shirt in three colors and two sizes. That's 6 variants. All cost the same to produce—$3.50. You'd enter that cost 6 times, one variant at a time.
Pro Tip: Use Variant-Level Costs, Not Product-Level Averages
Shopify lets you set costs per variant. Do this. If you sell the same product in small and large, and large costs $0.50 more to produce, track that difference. A product-level average hides margin problems.
Method 2: Bulk CSV Import
Time to set up: 30 minutes (first time) to 2 hours (100+ products)
Best for: Importing initial data, quarterly updates, small to mid-size catalogs
Accuracy rating: High (requires careful CSV formatting)
If you've got dozens or hundreds of products, manually entering costs one by one isn't realistic. Shopify's CSV import lets you upload cost data in bulk.
Step 1: Export Your Current Product Catalog
- Go to Products
- Click the menu icon (three dots) in the top-right
- Select Export → Export all products
- Choose CSV
- Download the file to your computer
[IMAGE PLACEHOLDER: Screenshot of Shopify's export products menu with the three-dot icon highlighted and the export options visible]
Step 2: Add Cost Data to the CSV
Open the exported CSV in Google Sheets or Excel. You'll see a column labeled Variant Compare At Price. Look for a column called Variant Cost (or create one if it doesn't exist).
The CSV format is straightforward:
| Handle | Variant Compare At Price | Variant Cost |
|---|---|---|
| blue-tshirt-unisex | 29.99 | 3.50 |
| blue-tshirt-unisex | 29.99 | 3.50 |
| grey-tshirt-unisex | 29.99 | 3.75 |
Each row is a variant, and the Variant Cost column holds your landed cost.
Common CSV pitfall: If you're re-importing after Shopify has already assigned costs, include the Variant Cost column exactly as Shopify exports it. Mismatched column names = skipped data.
Step 3: Re-Import into Shopify
- Go to Products → Export/Import (or the menu icon)
- Select Import
- Upload your updated CSV
- Map the columns carefully—make sure Variant Cost maps to the cost field
- Review the preview and click Import
[IMAGE PLACEHOLDER: Shopify's column mapping interface showing how to match CSV columns to product fields]
Shopify will update all matching variants. Takes seconds. Then verify a sample of products to confirm the costs came through.
Step 4: Maintain the CSV Workflow
Whenever supplier costs change, export, update, and re-import. This works fine for quarterly updates, but it's not continuous.
Track this automatically
Shopimize shows your real profit per order, per product, per channel.
Try Shopimize free →Method 3: COGS Tracking Apps (The Scalable Solution)
Time to set up: 5–15 minutes
Best for: Growing stores, frequent cost changes, landed cost automation
Accuracy rating: Very high (auto-synced data)
Cost: Free to ~$30/month depending on features
Apps designed specifically for COGS tracking eliminate the manual labor. They sit between your suppliers, inventory management, and Shopify—automatically syncing costs as prices change.
What COGS Tracking Apps Do Differently
- Supplier integration: Connect your supplier accounts (or import price lists) once, and costs auto-sync as they change
- Landed cost automation: Calculate inbound shipping, duties, and other add-ons per product, reducing manual math
- Variant-level accuracy: Track costs separately for each variant without spreadsheet friction
- Audit trail: Know when costs changed and why (instead of overwriting old data)
- Multi-warehouse support: Manage different costs across different locations
- Currency conversion: If you buy from international suppliers, auto-convert costs at current rates
Setting Up a COGS Tracking App (General Steps)
Most apps follow a similar pattern:
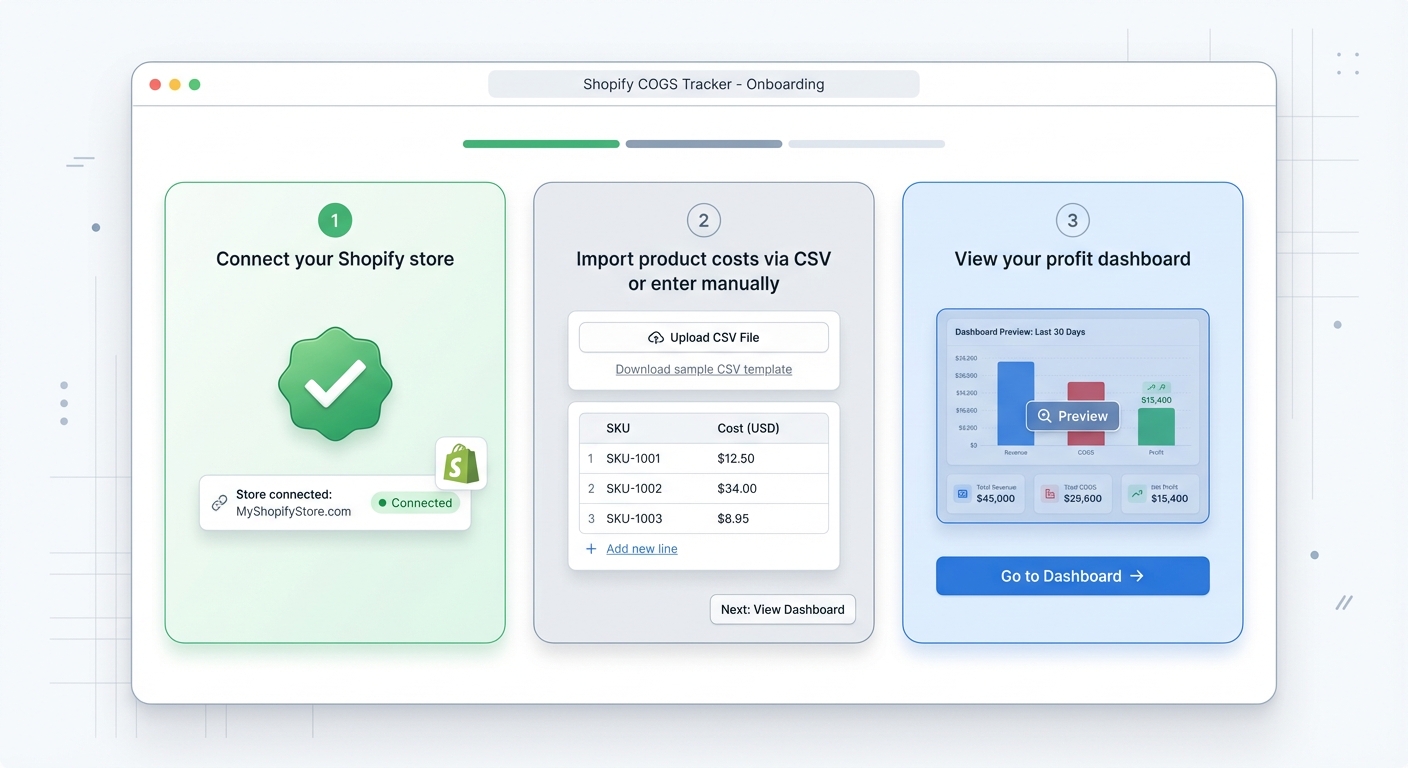
- Install the app from the Shopify App Store
- Connect your Shopify store (admin access required)
- Import your product catalog (usually one click)
- Set up cost data:
- Manual entry for existing products
- Or import via CSV
- Or connect your supplier accounts
- Configure automation (auto-sync from suppliers, landed cost rules, etc.)
- Verify costs sync to Shopify (the app should update the Variant Cost field automatically)
Shopimize, for example, connects to your Shopify store and pulls cost data from your products. You can then track landed costs, supplier pricing, and inventory adjustments all in one place—and your Shopify profit reports stay accurate without ongoing spreadsheet maintenance.
[IMAGE PLACEHOLDER: Screenshot of a COGS tracking app dashboard showing products with their costs, a supplier price sync status, and landed cost calculations]
Comparison: Which Method Should You Use?
Here's the honest breakdown:
| Approach | Setup Time | Monthly Time | Scalability | Accuracy | Cost | Best For |
|---|---|---|---|---|---|---|
| Manual (Built-in field) | 30 min | 2–4 hours | Poor (under 100 SKUs) | High (if maintained) | $0 | Solo sellers, tiny catalogs |
| CSV Import | 45 min | 1–2 hours | Fair (100–500 SKUs) | High (if formatted right) | $0 | Quarterly updates, stable costs |
| COGS App | 15 min | 15 min | Excellent (500+ SKUs) | Very high (auto-synced) | $0–30/mo | Growing stores, frequent changes |
Let's put this in real terms: You sell 150 products with 3 variants each (450 total cost entries).
- Manual method: 6–8 hours to enter initial costs. Update takes 1+ hour every time a supplier price changes. After month two, you're probably behind.
- CSV method: 90 minutes to set up the initial import. Update takes 45 minutes quarterly. Works okay if costs are stable.
- App method: 15 minutes to set up. 10 minutes a month to verify sync is working. You're always up-to-date.
If you're at 50 SKUs and costs rarely change, the manual or CSV method is fine. If you're at 200+ SKUs or you buy from suppliers with fluctuating prices, an app pays for itself in time saved.
A Realistic Scenario: From Zero to Automated
Let's walk through a real example.
You're Sarah. You run an online shoe store. You carry:
- 8 shoe styles
- 6 sizes per style (S, M, L, XL, 2XL, 3XL)
- 3 colors per style
- Total: 8 × 6 × 3 = 144 variants
Your suppliers give you a price list with cost per unit. Some include shipping; others don't. You need to land those costs at your warehouse.
Day 1: Initial Setup with CSV
You export your Shopify catalog (100 products, 144 variants). In a spreadsheet, you add:
- Base cost per unit (from supplier invoice)
- Inbound shipping cost per unit
- Duties and fees per unit
- Total landed cost per variant
Then you re-import. Takes about 90 minutes start to finish.
Month 2: Supplier Price Increases
One of your shoe suppliers increases prices by $1.20 per unit. You export your CSV, update all 48 variants for that supplier, and re-import. Takes 30 minutes.
Month 3: New Supplier
You add a second supplier for your XL sizes (different factory, different cost). You need to update 18 variants with new landed costs. Another 20-minute update.
Month 6: You're Drowning
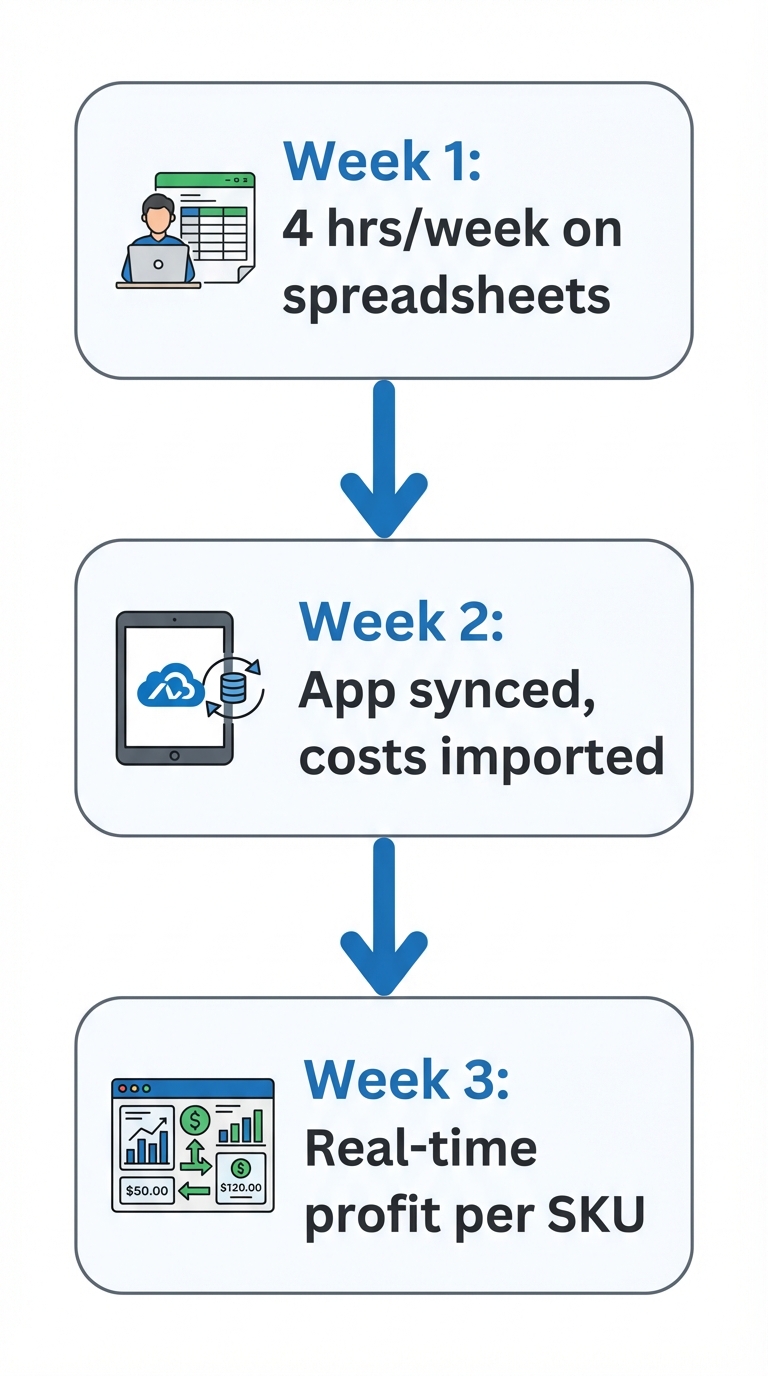
You've got three suppliers now. Costs change monthly. You're spending 1–2 hours every week just keeping the spreadsheet current. You also missed an update, and your reports show inflated profit for a whole product line until you noticed.
Month 6, Alternative: Using a COGS App
Install the app (10 minutes). Connect your supplier accounts (15 minutes). The app auto-syncs costs from suppliers every week. You spot-check once a month. You spend 10 minutes.
Common COGS Tracking Pitfalls (And How to Avoid Them)
Pitfall 1: Forgetting to Update After Supplier Price Changes
The problem: Your supplier raises prices, but you don't update Shopify. Your profit reports stay frozen in the past.
The fix: Set a calendar reminder to review costs quarterly. Better: use an app that auto-syncs.
Pitfall 2: Ignoring Inbound Shipping in COGS
The problem: You only track the supplier invoice price, not the landed cost. A $5 product with $2 in inbound shipping is really a $7 cost.
The fix: Include landed cost, not just supplier cost. If you use an app, look for landed cost automation.
Pitfall 3: Using Product-Level Averages Instead of Variant-Level Costs
The problem: You sell a t-shirt in small, medium, and large. Mediums cost $3 to make; larges cost $3.75 (more fabric). You average them to $3.25 for the whole product.
Now you're overstating profit on mediums and understating profit on larges. Terrible for decision-making.
The fix: Enter costs per variant, not per product. This is one area where Shopify's built-in field actually excels—it forces variant-level accuracy.
Pitfall 4: Not Accounting for Duties and Tariffs
The problem: You import from overseas. You ignore the tariff cost in COGS.
The fix: Calculate landed cost including all import fees. Landed cost = supplier cost + inbound shipping + duties + other freight.
Pitfall 5: Setting It Up Once and Ignoring It
The problem: You enter costs in month one. Supplier prices change in month six. Your reports are now fiction.
The fix: Schedule monthly or quarterly cost reviews. For high-velocity stores, use an app with auto-sync.
FAQ
What if I have multiple suppliers for the same product?
Track the cost from your current supplier. If you use different suppliers for different variants (e.g., one factory for small/medium, another for large), track them separately at the variant level. Some COGS apps let you track multiple costs per variant (e.g., seasonal suppliers), which is helpful for complex sourcing.
Can I include labor costs in COGS?
Yes, but typically only if you're manufacturing or assembling products in-house. For products you're sourcing from suppliers, labor costs are usually embedded in the supplier price. For custom builds or personalized items, you can factor labor in. Just be consistent—don't include it for some products and not others.
How do I handle seasonal cost changes?
If you buy winter stock in August at a different cost than summer stock in April, track the landed cost of the actual inventory you hold. Some COGS apps let you track historical cost changes with an audit trail, which is helpful for annual reporting. If you're using CSV, you can update costs quarterly or whenever prices shift significantly.
What happens to old COGS data if I change costs?
Shopify doesn't keep a historical cost record (unless you use an app with an audit trail). When you update the Variant Cost field, the old cost is replaced. If you need historical data for tax or accounting purposes, keep your own backup records—export your CSV before making bulk updates.
Can I use different COGS for different sales channels (Shopify, Amazon, etc.)?
Shopify's built-in Variant Cost field applies to all sales channels in Shopify. If you sell on Amazon, that's managed separately in Amazon's seller dashboard. So if you're comparing profit across channels, calculate it separately for each platform. Some accounting software (like Shopify's native accounting integration) can help consolidate this.
What's the difference between "Cost per item" and "Compare at price"?
Cost per item = how much you paid for the product (COGS).
Compare at price = an optional "full price" shown before a discount (used for sale labeling). They're unrelated. Don't mix them up.
Does Shopify automatically calculate profit margins?
Shopify doesn't display profit margin on the product admin page, but if you use a reporting app or tool like Shopimize, you can see profit and margin calculated from the Variant Cost field. Shopify's built-in analytics also includes COGS reporting if you're on a paid plan.
Next Steps: Implementing COGS Tracking
If you've got fewer than 50 products and costs are stable, start with the manual built-in field. You'll learn the ins and outs, and it takes minimal setup time.
If you're at 100+ products or costs change monthly, skip straight to the CSV import. It's worth the 90-minute learning curve.
If you're growing and want to stop fiddling with spreadsheets, a COGS tracking app removes the friction entirely. You set it up once, and costs stay accurate without ongoing manual work.
Summary: Your COGS Setup Checklist
- [ ] Choose your method (manual, CSV, or app)
- [ ] Identify all components of landed cost (supplier price, shipping, duties, packaging)
- [ ] Set up variant-level costs (not product-level averages)
- [ ] Enter or import initial cost data
- [ ] Verify costs are pulling correctly into Shopify
- [ ] Set a reminder to review and update costs quarterly
- [ ] Monitor your profit reports—if margins look off, audit your cost data
Want COGS tracking that stays accurate automatically? Try Shopimize free — set up in under two minutes, no spreadsheets required.